
Shutter speed in photography

Image Source - https://commons.wikimedia.org/wiki/File:Windflower-05237-nevit.JPG
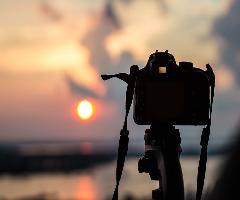
Shutter speed is one of the most powerful tools at the disposal of the photographer. By mastering it, we can essentially freeze reality, stop time and witness the magic of nature that is hidden from us by their sheer speeds, like the journey of water-spray particles in a fast-moving jet of water. It is possible to 'freeze' something like rainfall, storm and lightning, using shutter adjustments. As such, it is of extreme importance for the amateur photographer to learn to use this powerful tool.
Ok, so in my previous post, I've described the concept of the exposure triangle, i.e the three factors that determine the total exposure your image is going to have. To brush up the facts, they are 1. ISO 2. Shutter speed and 3. Aperture. Here in this part of the tutorial, I am going to ramble a bit about shutter speed.
Please do remember that it is for beginners only, and if you're a practised photographer and get bored while reading, just don't blame me. :)
What is shutter speed?
As I've written already, shutter speed is basically a measure of the time duration for which your camera lens is exposed (i.e kept open) to the light. Keep the lens open for longer durations, and more light will enter, making your image overexposed. And keep it exposed for a very short time, and it will absorb less light, making your image dark, underexposed. However, like everything else concerning photography, there's simply more to it.
Shutter speed is indicated using numbers such as 1/100, 1/125, 1/250 and so on. Greater the denominator, greater is the speed. The number is the measure of the time for which the lens should be exposed to the image. For example, 1/100 means that your device is exposed to the image (i.e light fcoming from the source or subject) for one-hundredth of a second. Likewise, 1/2000 indicates that it is exposed only for1/2000th of a second.
Shutter speed is one of the most crucial concepts to master in photography. This is primarily because, by changing the shutter speed, you can not only control the exposure, but additionally it can create motion blur and resolve the very same.
Shutter speed and motion blur Since photography is a very dymanic subject, there's no comprehensive, follow-to-the-rim guide for choosing your shutter speed. However, as you go on practising more and more, you'll develop an idea about choosing the correct shutter speed. Still, if you're interested, below is a simple list of speeds for general situations:
1/2000: Ideal for 'freezing' water, especially when capturing a fountain.
1/1000: Perfect for capturing fast-moving planes and cars.
1/500: Good for shooting moving cars during the daytime.
1/250: General shutter speed for daylight photography.
1/125: Good for shooting still objects during daytime.
1/100: More or less the same as above.
1/60: Choose when you need to exposure your photo a bit more, or during nighttime (indoor lighting preferred). A cloudy day is quite perfect as well.
1/30: When you want to compensate for underexposure through other elements.
1/4: When you really, really want to increase the exposure, like during nighttime or lowlight photography.
If you've experimented a bit with shutter speed, you might find the above list to be inadequate to say the least. This is primarily because of the vastness of this subject, photography. There are different scenes, different lighting conditions, different times of the day, and most certainly a multitude of different types of images you'd want to capture. Hence, trying to document the ideal shutter speed for them all would fill an entire book. That's why it's best to experiment a bit with shutter speed and get the idea by yourself.
When you're shooting a fast-moving object such as a fast car, you'd want to select a high shutter speed, around 1/250 or 1/500. This makes your camera exposed to the light for very less time, and yet capturing a whole lot of detail if your other exposure settings are compensated (the ISO and aperture).
Freezing the frame
Similarly, a slow shutter speed is ideal for shotting still objects, or when you'd like to create a dramatic effect by including what is known as 'motion blur', loss of detail in the object in the direction of its motion. This creates an effect of dynamism in your image, making it appear that your subject is 'moving'. And if you manage to capture the frame well, you'll obviously leave a certain amount of space empty, in the direction of the subject's motion. This would create the feeling that your subject is 'moving'. However, for beginning photographer, it is better to stay glued to fast shutter speeds first, because perfect motion blur is something really, really difficult to master. And yeah, like everything else, it does take a lot of practice.
So, the rules of thumb for shutter speed are as follows:
1. Faster shutter speeds (denominator being more) reduce exposure, resolve motion blur. Ideal for capturing fast moving objects.
2. Slower shutter speeds (denominator being less) increase exposure, create motion blur. Ideal for creating motion blur, or compensating for exposure reduction in poorly lit environments.
Shutter speed can be used to create beautiful images. I myself really like the process of ''freezing' the water, from fountains or rivers, in your scene. An adequately fast shutter speed can do the trick, making the water jets appear still. It also makes tiny water droplets visible clearly.
Likewise, there are times when you might like to capture the moving nature of water bodies, especially streams and rivers. For these, a long exposure process (with less shutter speed) is ideal. But beware! This overexposes the image, so you must find a way to reduce exposure and balance it adequately by changing the values of ISO and aperture.
Beyond freezing the frame The exposure bar can be of great help to you, when you're experimenting with these settings. You'll find the exposure bar on the LCD screen and below the image preview on a Nikon camera. I don't have much experience with Canon devices, but I believe exposure bar is displayed above the preview, on a separate screen in most of them. No matter what its location is, it can be of tremendous benefit to learn to read the exposure bar. During the image preview, the bar shows you if the exposure is low or high, and the moment you change any of the exposure elements (ISO, aperture or shutter), the change in exposure is visible on the bar. Usually, on Nikon cameras, there's a + sign to the left, and a- sign to the right, with a mean position in the middle. If the indicator is exactly at the middle, it means the camera thinks your image is properly exposed. If it is towards the right, underexposure is on the way, and vice versa. Learning to use it is crucial to photography improvement.
Besides dealing with motion, shutter speed can also be used to increase exposure in lowly lit conditions, especially during indoor or nighttime photography. I have personally discovered its use whenever I wanted to capture a nighttime landscape or portrait. Just increase your shutter speed, improve the ISO and select a proper aperture, and your image can be good to perfect! This is truly the magic of the shutter.

In this era of digital photography, almost everyone has a camera, be it a fancy dSLR or a simple smartphone shooter. But technology can only do so much, and we should learn to use its benefits for ourselves.
Are you a user of Windows 7 running PC? If you are using Windows 7 running PC and getting the worst performance out of your PC, then you should try these tips for improving performance of your PC..